Steelers Country
April 29, 2026
Without exception, this is the coolest project I've ever worked on.
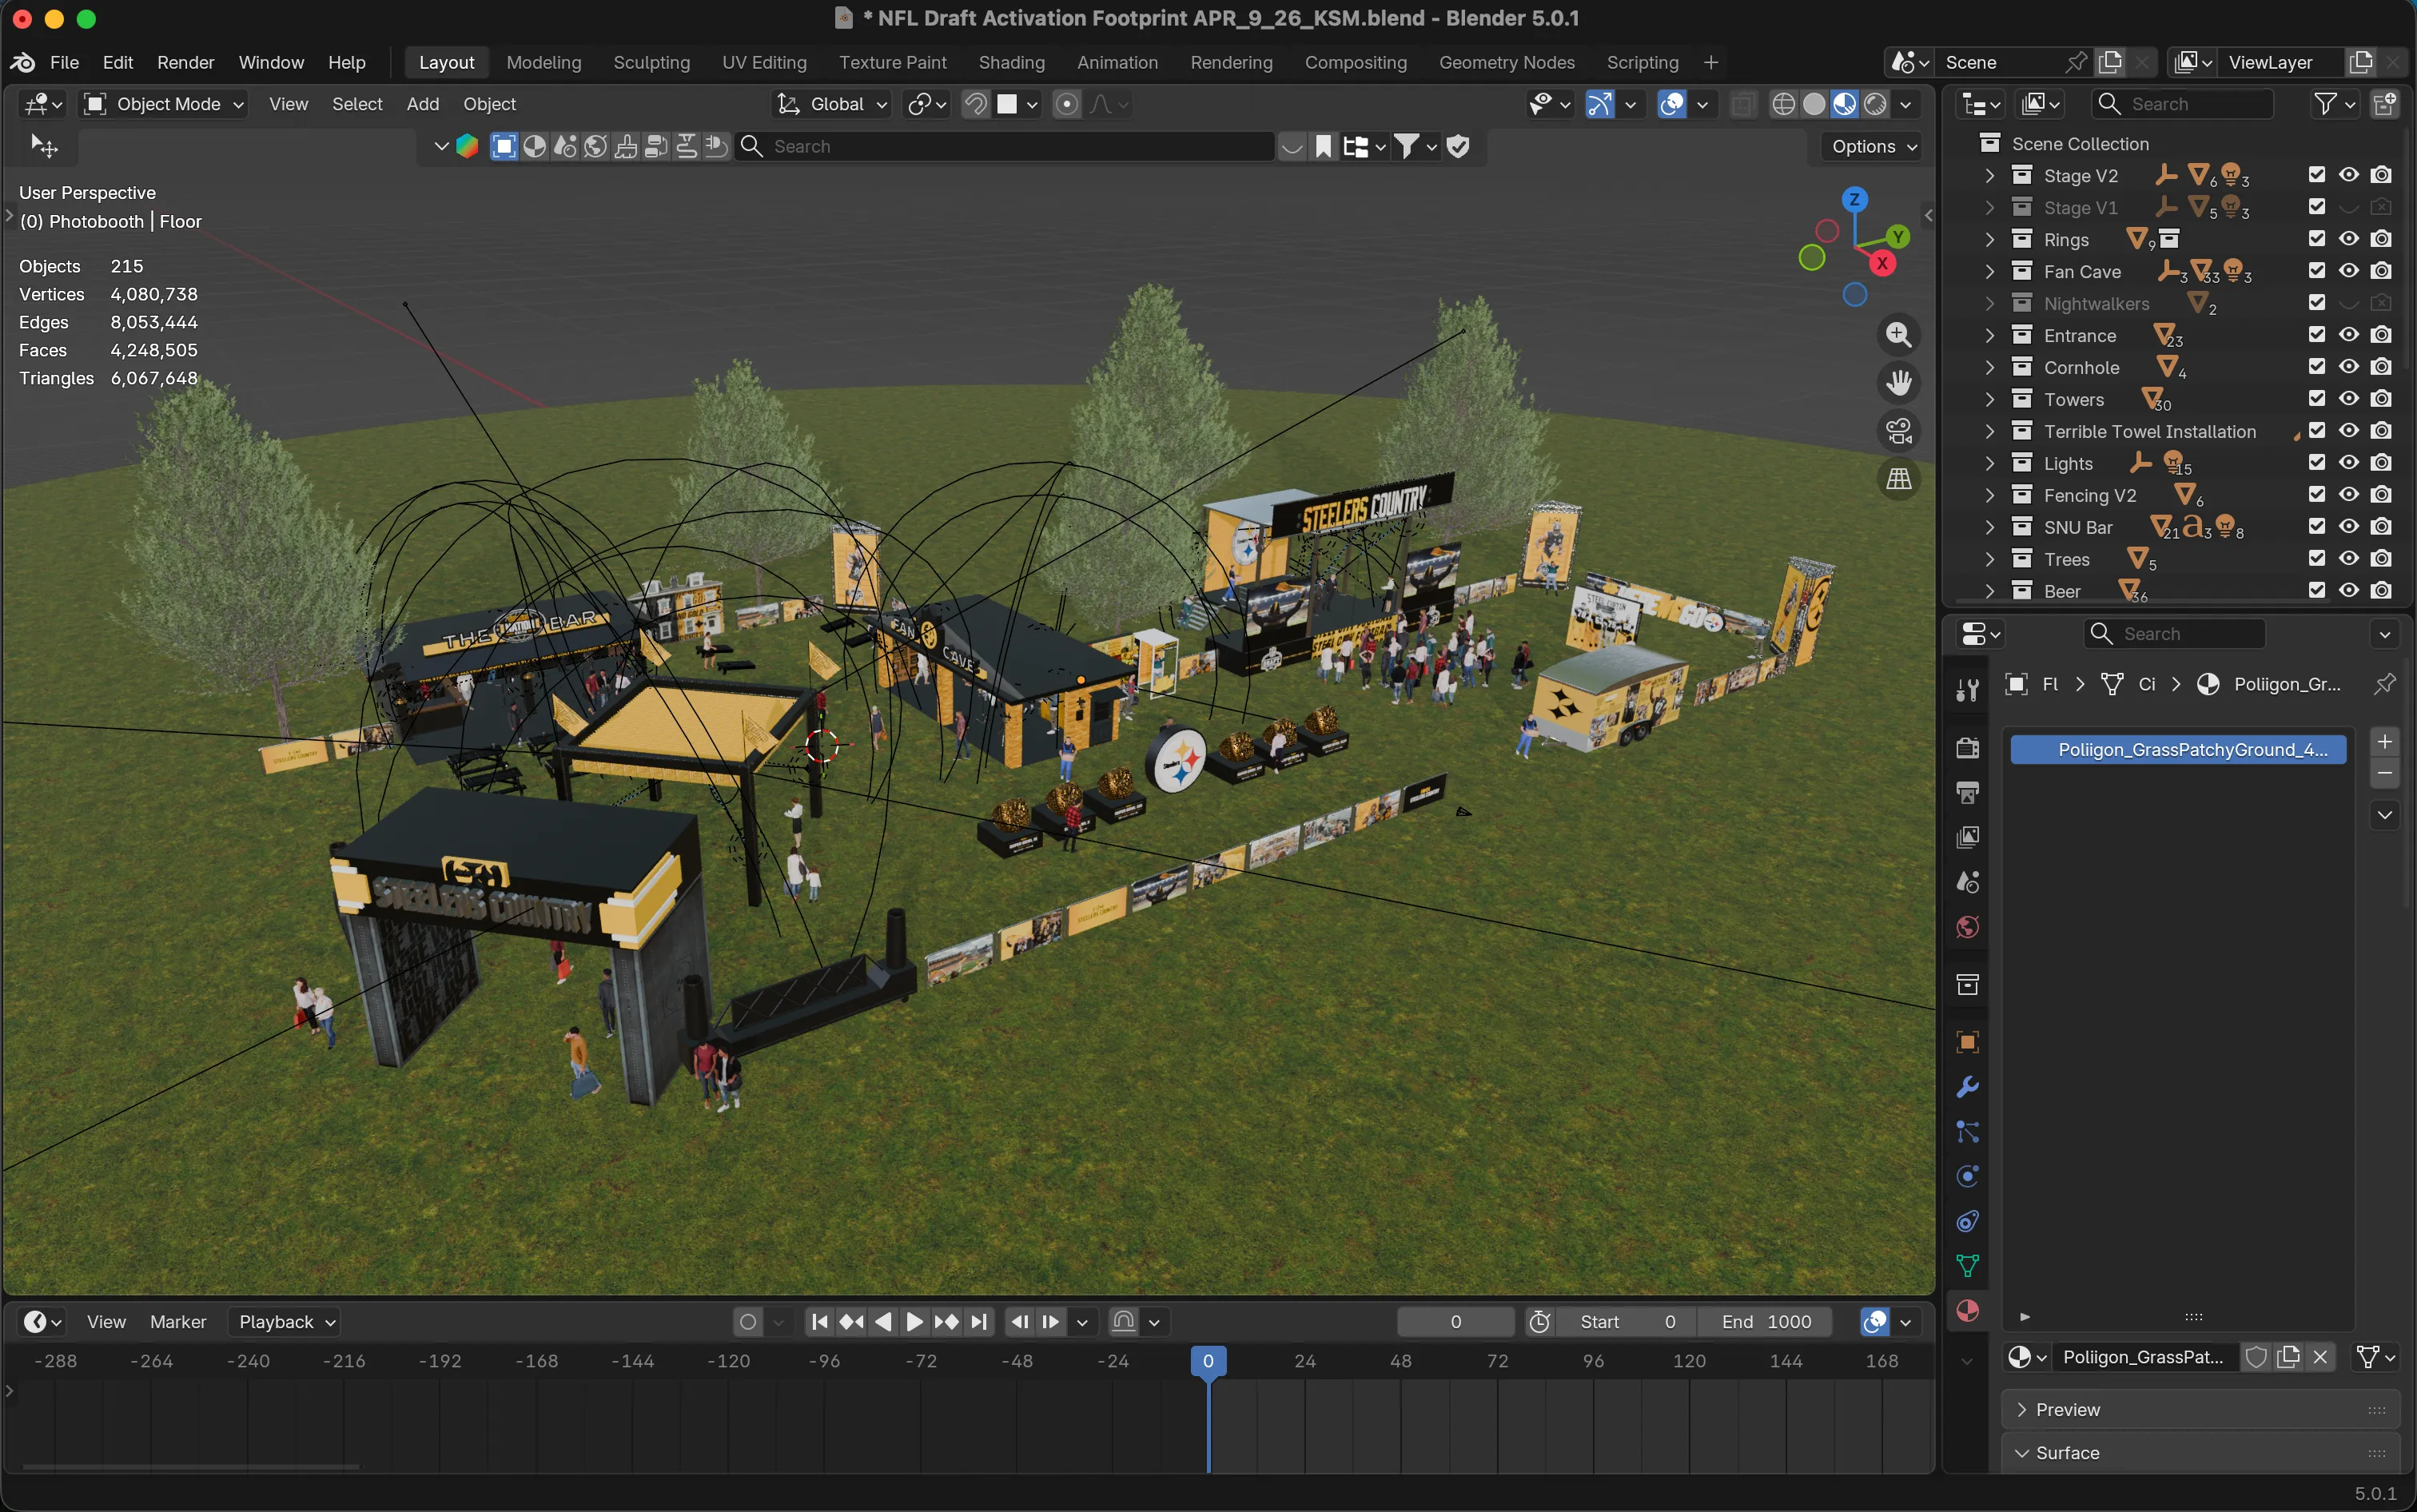
The creative agency that I worked for, Actual Size, recently had the opportunity to craft the Steelers fan experience at the 2026 NFL Draft. Within our small team of eight I fell into a 3D designer role, modeling the experience footprint so that we had references to provide to both the construction team at Carpenter Connection and the Steelers team. In that regard, I had a small hand in building every part of Steelers Country. However, my biggest contribution was the experience's pièce de résistance: the Terrible Towel installation.
I was the mathematician behind the Terrible Towel installation's lenticular effect and I'd like to give you a brief overview of how I did it.
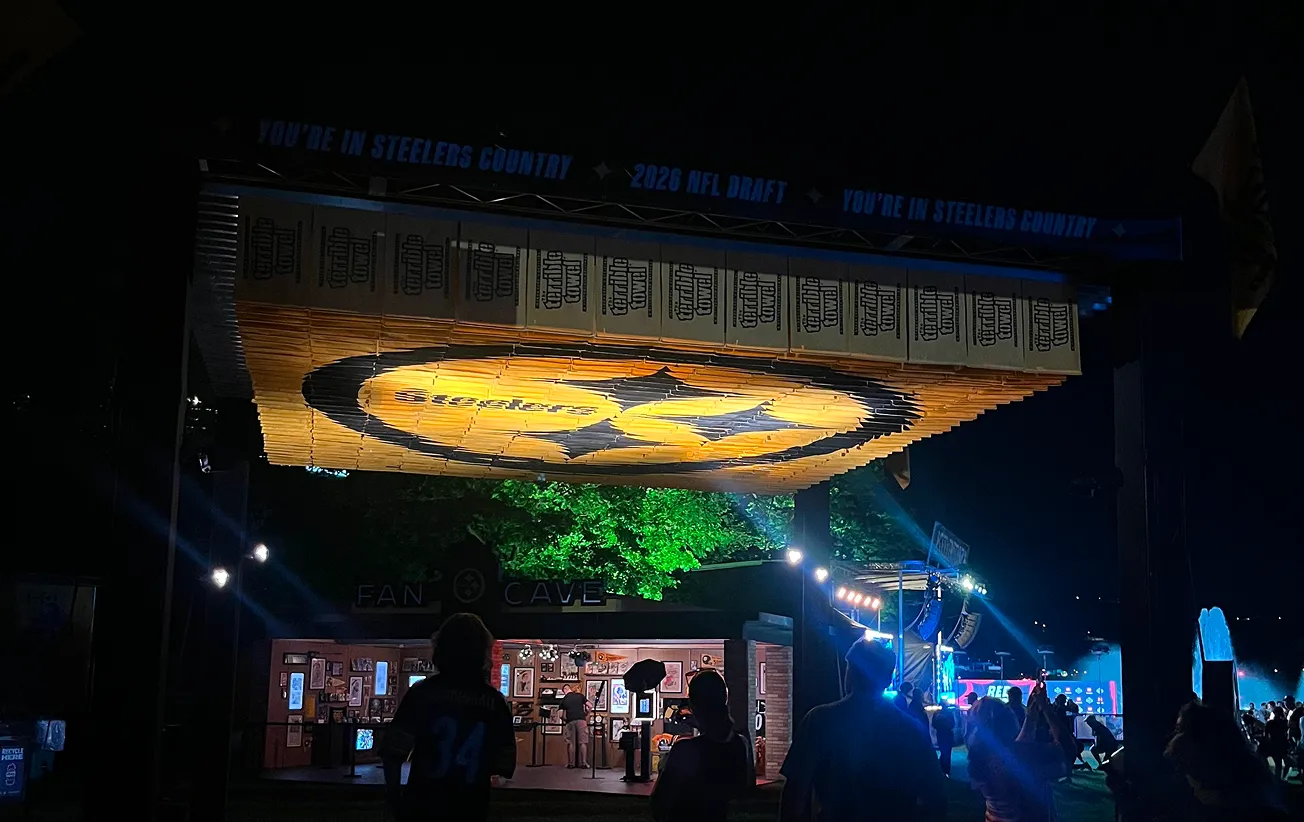
The Terrible Towel Installation
The inspiration during the initial meeting was “out of many, one”. To symbolically represent one of football's most passionate fanbases, we wanted to use many Terrible Towels to convey one unified message. This lenticular effect idea was proposed where if you stood a certain distance away from many hanging towels you’d be able to see one image. It fit our inspiration perfectly. As the most technically-minded person in the office, execution of this idea became my responsibility and ultimately it came down to solving two guiding questions:
- How much visible space is at the bottom of each towel?
- What goes on the bottom of each towel?

Mathematical Intuition
To answer our first question we need to recall as much algebra, geometry, and trigonometry as we can. The figure below shows a rough outline of the problem as I interpreted it.
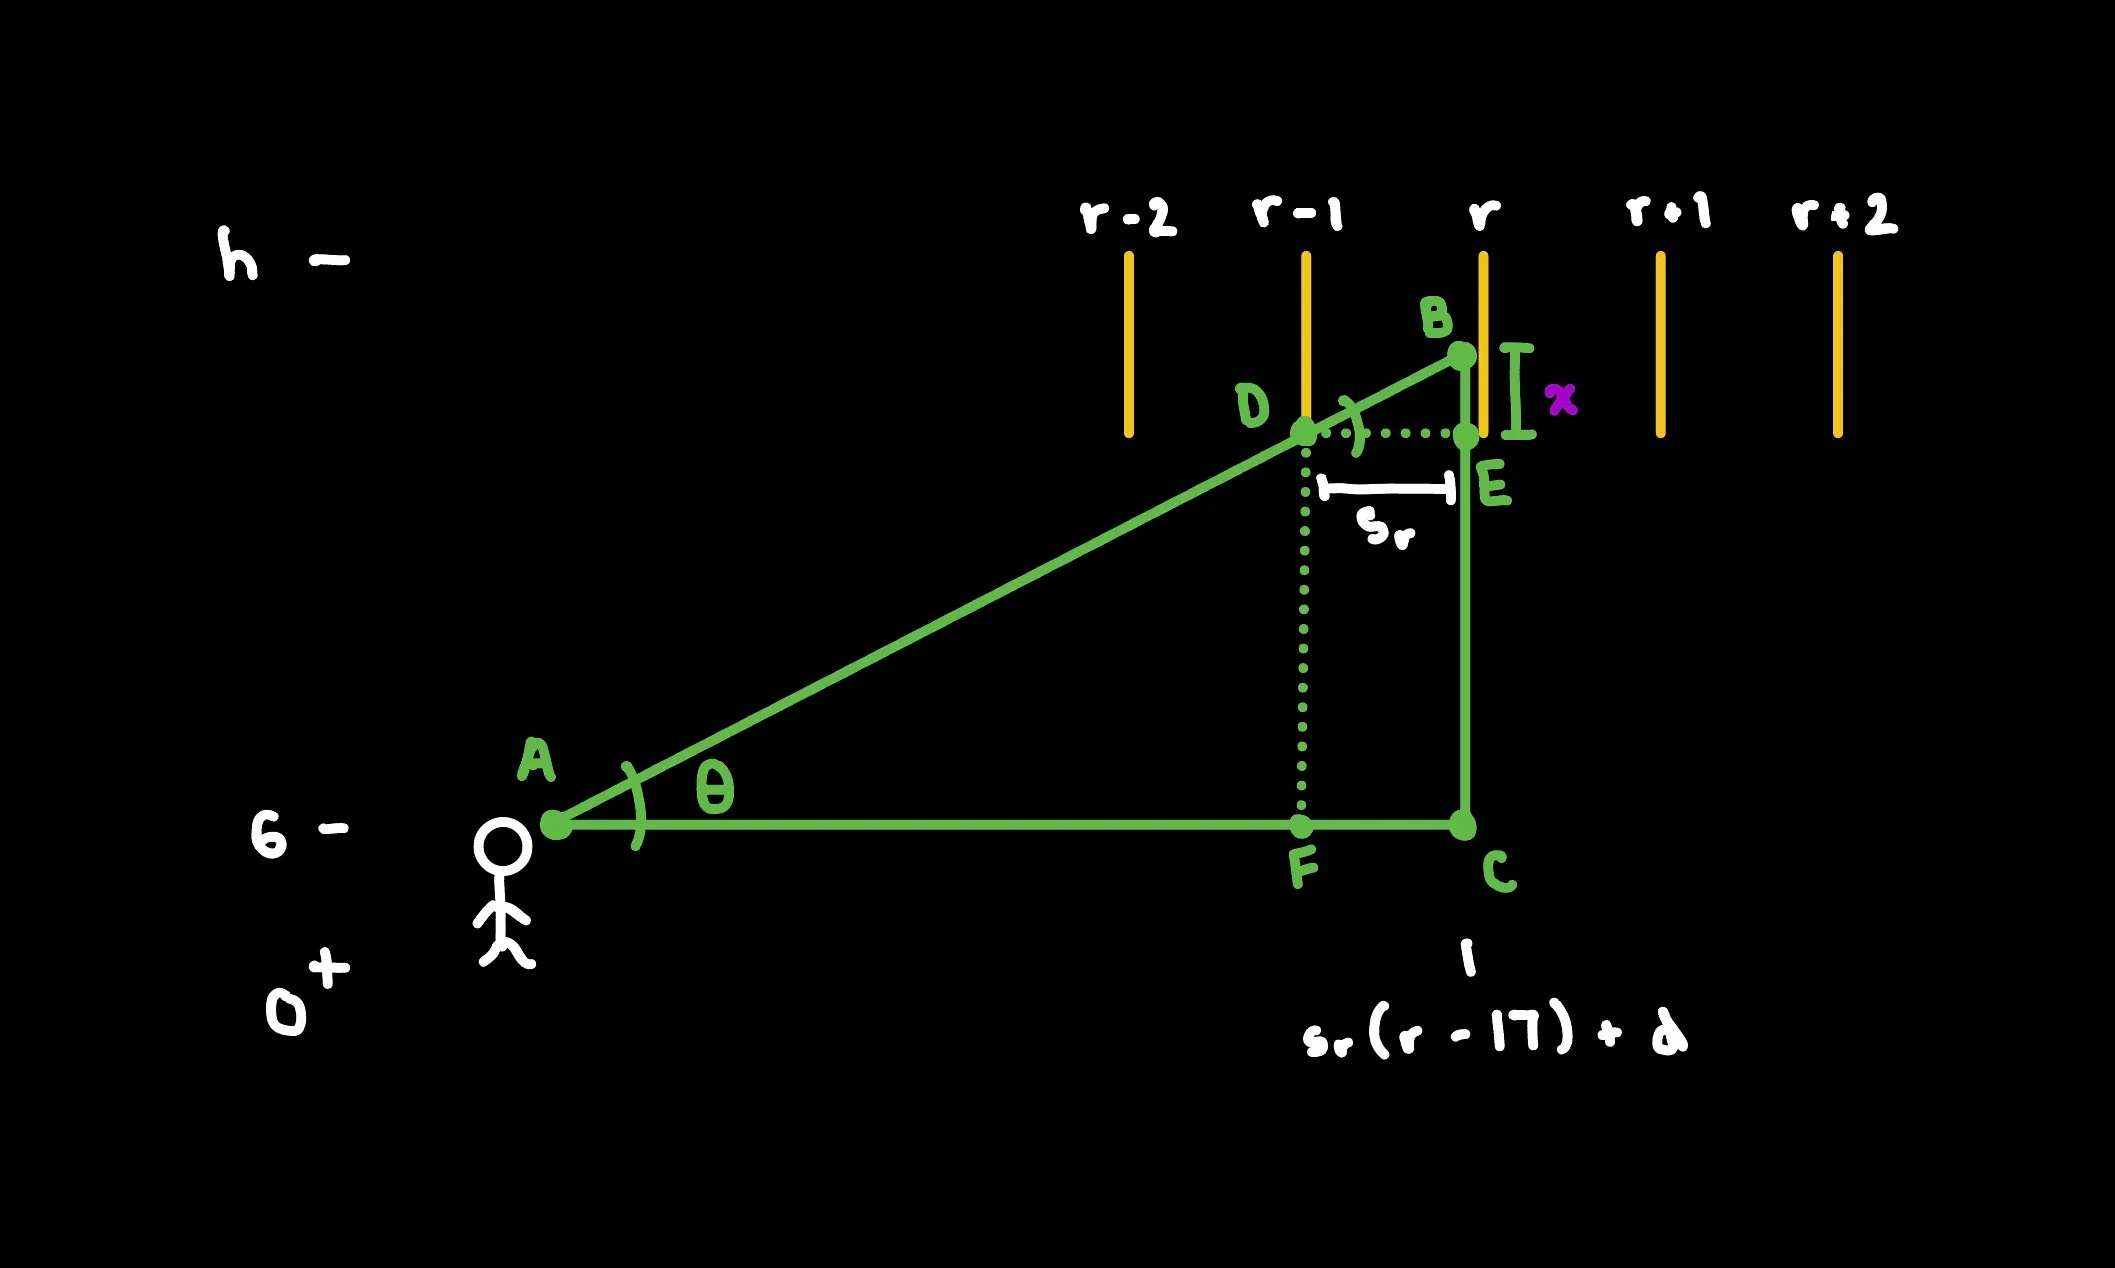
Figure 1. Reference diagram showing the relevant dimensions and angles.
My goal was to come up with a function that would consider the height of the towels h, the intended viewing distance d, and the spacing between rows sr and output the amount of visible space at the bottom of the towels in any row r.
The visiblity of row r is obstructed by row r - 1. So from our arbitrary human perspective (a person standing d feet away whose eyes are 6 feet above the ground), the line of sight formed by ADB tells us exactly where our visible area in row r ends. It follows that the distance from the top of this visible area, marked by point B, to the bottom, marked by point E, is the height of the visible space that we're interested in. I've labeled this distance x.
We begin solving for x by trying to measure ∠BAC. Note that for this task it is sufficient to measure ∠DAF. We know the length of DF as it's the height of the towels h minus the towel's width (roughly 25 inches), and we know the length of AF as it's given by our intended viewing distance and our chosen spacing between rows. These lengths allows us to use trigonometry to measure our desired angle.
DF = (h - (25 / 12)) - 6
AF = sr ⋅ ((r - 1) - 17) + d
∠BAC = ∠DAF = arctan(DF / AF) = θ
Corresponding Angles Postulate
If two parallel lines are cut by a transversal, then the pairs of corresponding angles are congruent.
Next, we employ the Corresponding Angle Postulate. Since our eyeline represents a transversal intersecting the ground and the bottom of the towels, the Corresponding Angle Postulate tells us that ∠BAC must be equal to ∠BDE. This is particularly helpful for us because, in looking at ▵BDE, we now have ∠BDE and its adjacent side length. With these values, we can calculate x, our desired opposite side length.
∠BAC = ∠BDE = θ
tan(∠BDE) = tan(θ) = BE / DE = x / sr
tan(θ) = tan(arctan(DF / AF)) = DF / AF = x / sr
x = sr ⋅ DF / AF
That last equation tells us everything we need to know given our chosen constants. Based on the height of the towels, the intended viewing distance, and the spacing of the rows we can now calculate the height of each row's visible area, thus answering our first guiding question.
Image Placement
Before continuing on to our second guiding question we should stop to understand that the result from our first guiding question tells us about both the space that the projected image will occupy on the towels as well as how we should be thinking about cutting the projected image for placement on the towels. For our purposes, we didn't account for any perspective distortion that may occur when viewing the towels up close because our intended viewing distance made that distortion negligible. This meant that we could slice the projected image into equal width columns. Rows, however, were trickier and needed to utilize the function we obtained from our work above to determine the heights of each row.
Let n be the number of rows of towels and let f(r) represent the function giving us the height of the visible area in row r. Then the sum of all f(r) values will tell us how much height we have to project into. That is to say, if the height of our image is 1024 pixels, then we need to map those 1024 pixels into Σ n r = 1 f(r) inches (we used inches but an adjustment could be made for any unit of distance). Whereas the columns we slice our image into can be of equal width, the rows that we slice our image into must have varying heights. More specifically, the height of row r should be proportional to
f(r) / Σ n r = 1 f(r).
In practice, this means that after we slice up the image the rows at the top will be taller than the rows at the bottom.

Figure 2. Though the "slicing" of the images was handled entirely programmatically, the visuals above demonstrate the intuition behind that slicing.
Shader Implementation
To answer our second guiding question we need to step into the digital demo that I built out.
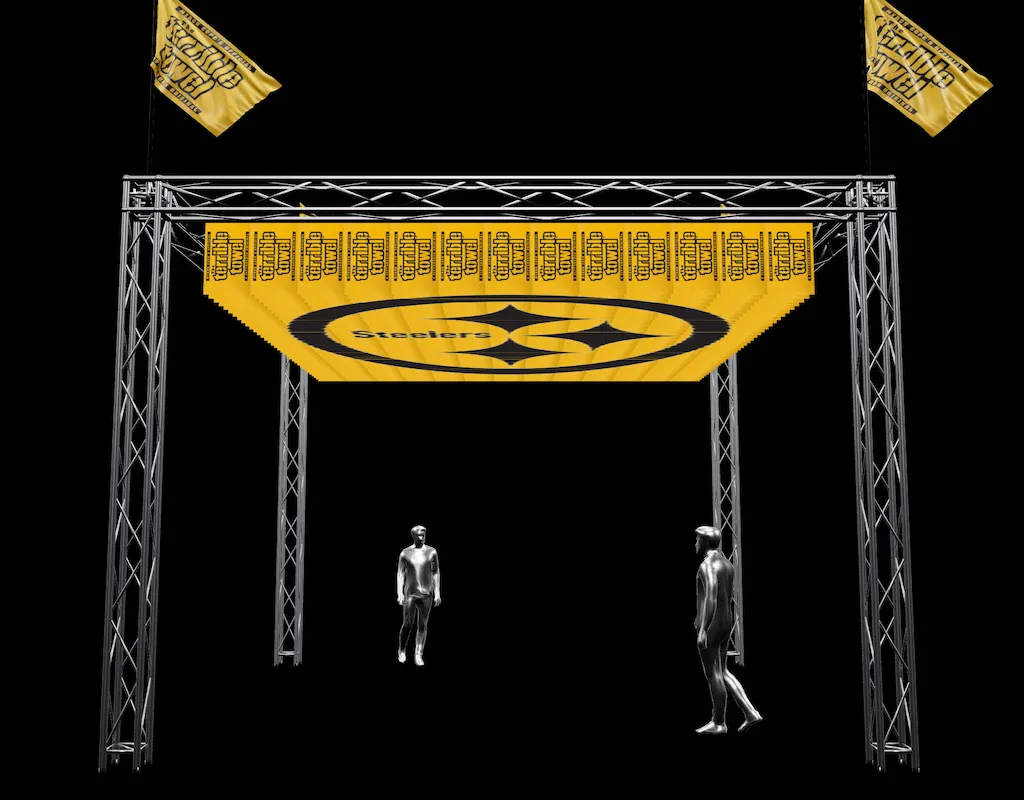
The 3D world in this demo has a scale model of the metal structure, some humans for reference, and all of the towels that we would be projecting onto. This reference site became the expectation, and so before we began construction I came up with a workflow that would allow us to physically replicate each towel as it appears in the 3D scene. This workflow relied heavily on shaders.
The world of shaders is vast and a single blog post could never explain the entirety of its nuance. At a high level, for every pixel that an object occupies on your screen, shaders answer the question "What color should I be?". At the risk of getting too involved, you can think of a shader program as a function that controls the red, green, blue, and alpha transparency channels of every pixel.
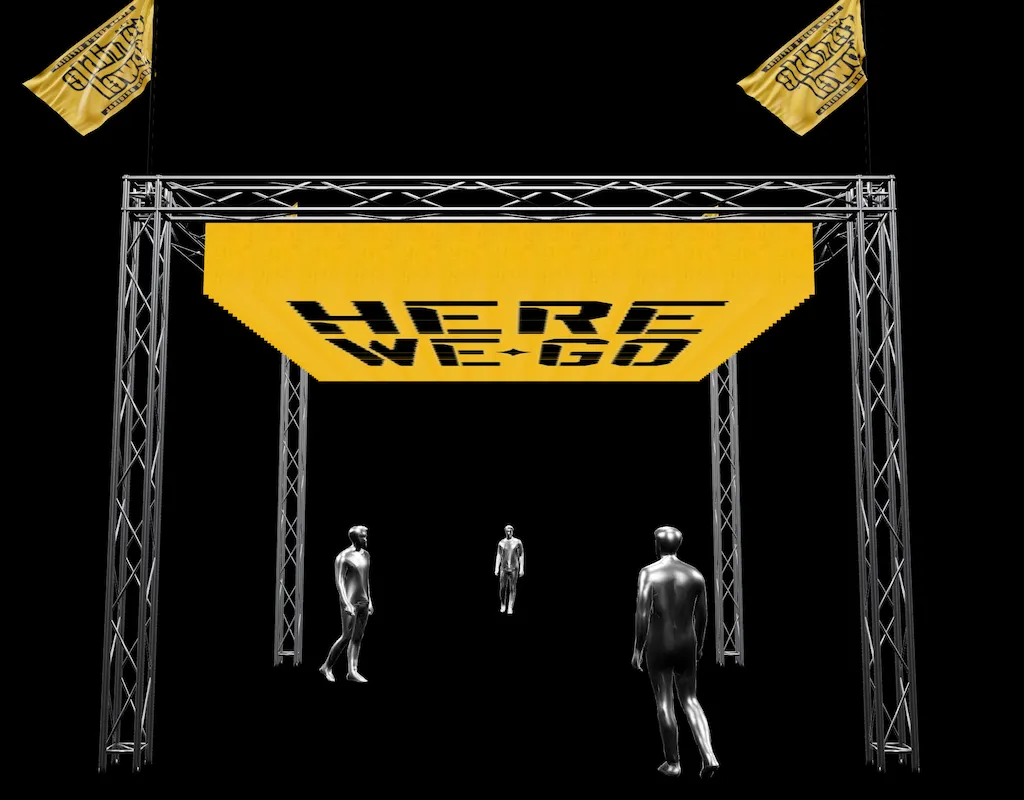
Each towel is added to the 3D scene as a 2D plane and my custom shader mixes the color from the Terrible Towel image and the color from the projected image (the Steelers logo on the front, "Here We Go" on the back). Thinking back to the intuition from figure 2, the goal was to project each cell from the grid defined by those guidelines onto a towel. Accomplishing this task was tricky but the shader essentially walks through the following steps:
- Scale the projected image up.
- Translate (shift) the image so that the bottom of the desired grid cell is aligned with the bottom of the 2D plane.
- Crop the top of the projected image based on the height of the desired grid cell.
- Mix the transformed projected image with the base Terrible Towel image, opting for the projected image's RGB values where the alpha transparency value is nonzero, and the Terrible Towel image's RGB values otherwise.
Just four steps! In practice, unfortunately, translating the above English into a shader was quite arduous (though perhaps the difficulty can be attributed mostly to my unfamiliarity with the language, GLSL). There were certainly easier ways to achieve this result in the 3D scene but because I spent so much time refining this shader workflow, I was easily able to output images of the art that would need to be printed onto each towel.
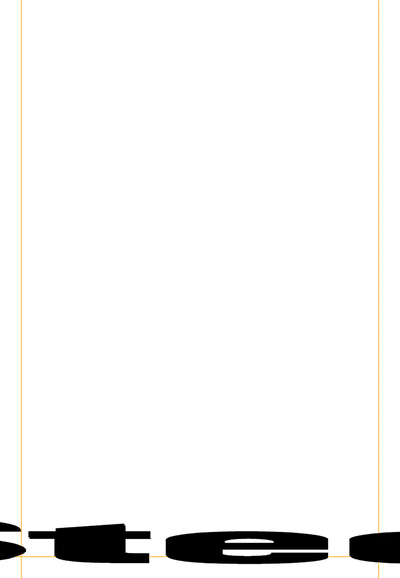
The front-facing art for the 4th towel in the 14th row, with added visibility on the sides and bottom to account for irregularities in towel size.
These images, of which there were 600 that we cared about (i.e. not blank), gave us the answer to our second guiding question. Unfortunately, they also gave us an incredible amount of work.
Towel Production
I would be remiss if I didn't thank everyone at Actual Size for their help in the production of these towels. From exported images to fabric starch and heat transfer vinyl, these towels became our obsession. Everyone jumped in to participate in the truly mind-numbing work and it was the team effort that led to the towels looking as good as they did.
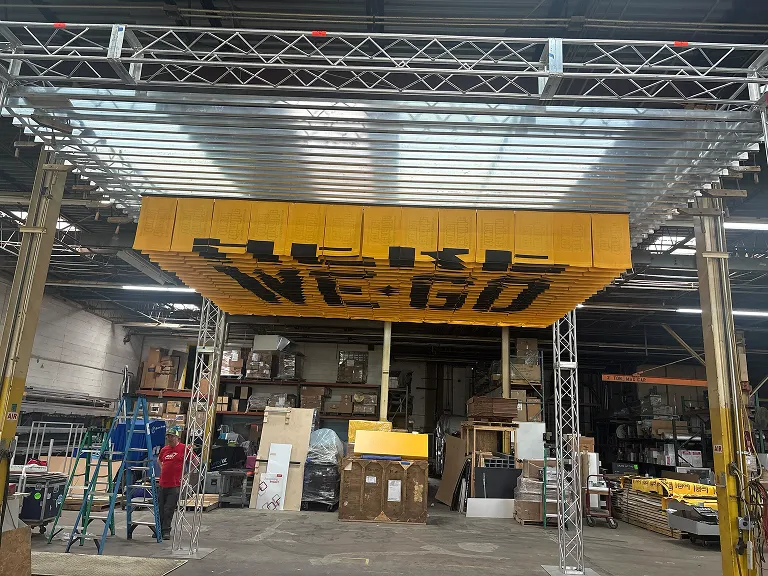
Once all of our towels had been printed we sent them off to Carpenter Connection where they'd be hung from the metal structure. At that point I was probably the most nervous I'd ever been. There was no backup plan if my math was wrong and it was clear that no one was going to relax until we had photo evidence of the towels hanging in place with the expected effect. Thankfully the team at Carpenter Connection works fast. They were quick to share pictures and praise.
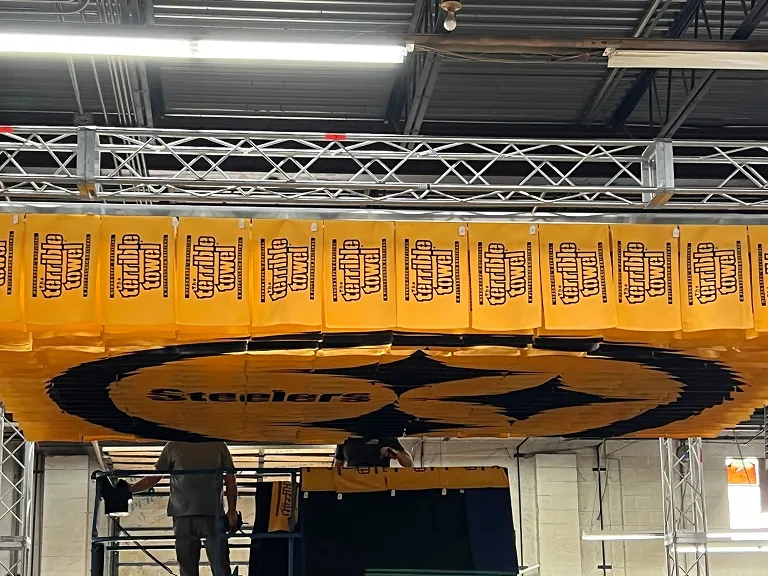
"That guy really knew what he was doing."
From ideation to realization, we pulled it off.
Acknowledgements
The 2026 NFL Draft event was the first time I got to see people experience the installation organically. Observing reactions as everyone discovered that we had "hidden" this message within an overwhelming number of Terrible Towels was priceless.
Regardless of whether or not you understood all of my technical jargon, I appreciate you for taking the time to read this. Thank you to Actual Size, Carpenter Connection, and the Steelers for trusting me and my math, and thank you to all the football fans that came out to see our work. As a Pittsburgh transplant, I now understand the pride that Yinzers take in their community and I'm eternally grateful that I was able to be part of providing this experience.